Dies ist eine alte Version des Dokuments!
Setting up REX3D with OpenFOAM
REX3D, in combination with our OpenFOAM solver, uses an encapsulated Linux environment. Once access has been configured, no further configuration is required. The required containers are automatically provided and set up by REX.
Two options are available for using the OpenFOAM solver:
- local operation of a Linux container in a WSL environment
- remote access to a Linux system
The setup of both options is described in the following sections.
Using a local PC with WSL
If you want to use REX3D with OpenFOAM locally, you must install WSL and use a local virtual machine.
Installing WSL on the client PC
Open Windows PowerShell with administrator privileges and enter the following command:
wsl --install
The system must then be restarted.
Adjusting the REX3D options
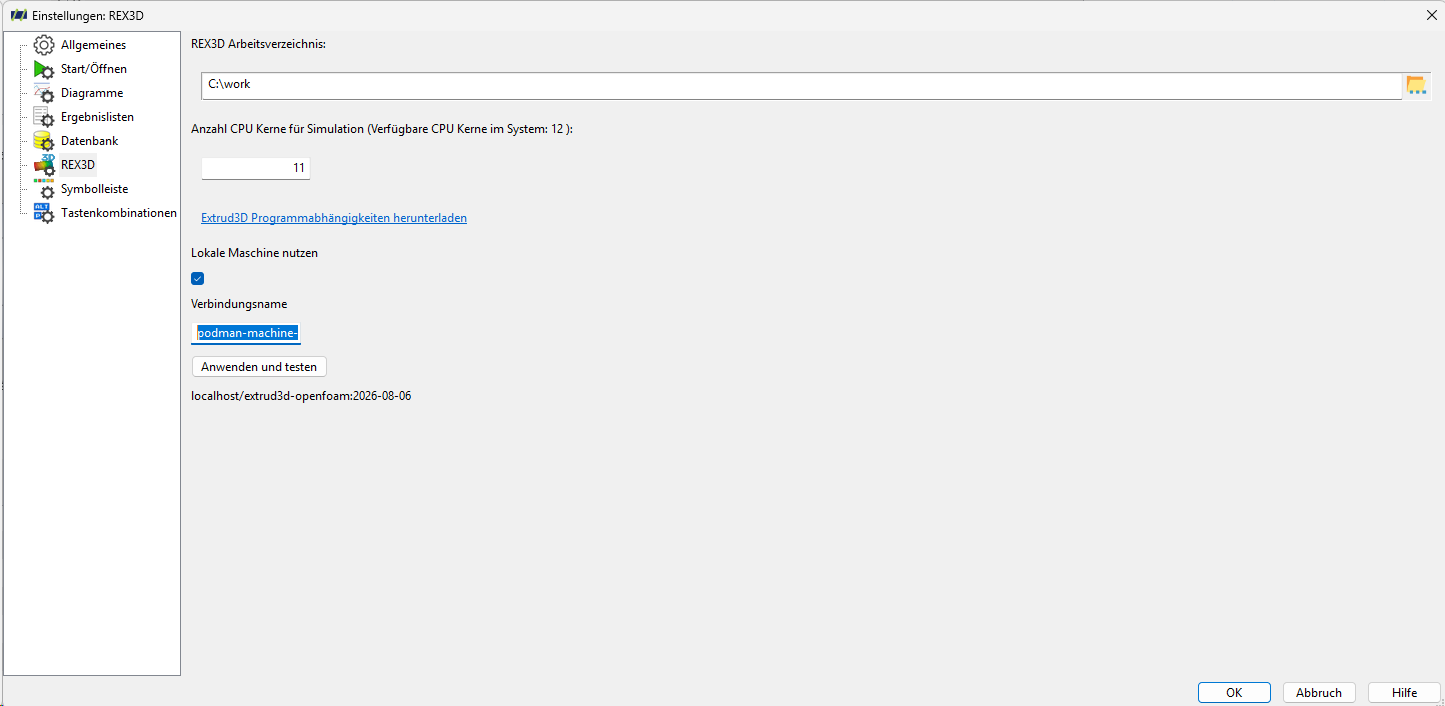
Then open Options > REX3D from the main menu in PSI / REX.
Select 'Use local machine' and enter 'podman-machine-default' as the connection name. Clicking the 'Apply and test' button sets up and prepares the WSL VM. In the next steps, you must specify the RAM, CPU cores, and disk capacity of the VM.
Using a remote server
The Podman remote client allows a Windows PC to access a Podman backend on a Linux server. The Podman backend provides the OpenFOAM environment required by REX3D or PSI.
For REX3D or PSI, the remote Podman installation behaves largely like a local Podman installation.
Requirements
The connection is based on a client-server model.
The following components are required:
- Linux server or Linux VM
- running SSH service on the server
- Podman on the server
- Windows PC with a REX or PSI version
- OpenSSH client on the Windows PC
- Podman client on the Windows PC
This guide is based on Ubuntu 24.04 or a comparable Ubuntu version with systemd. Podman is available from the official Ubuntu package repositories.
The following commands use placeholders. Replace them with the values from your environment:
- <SERVER>: hostname or IP address of the server
- <ADMIN>: administrative user on the server
- <e3d_usr>: unprivileged user for Podman and OpenFOAM
- <ssh_podman_e3d_usr>: filename of the SSH key
- <UID>: numerical user ID of the user <e3d_usr>
1. Installing Podman on the server
1.1 Logging in to the server
Open PowerShell on the Windows PC and establish an SSH connection to the server:
ssh.exe <ADMIN>@<SERVER>
1.2 Installing the required packages
First update the package information:
sudo apt-get update
Then install the required packages:
sudo apt-get install podman
Verify the installation:
podman --version
2. Setting up the Podman user
2.1 Creating a user without local password login
As an administrator, create a separate user for Podman and OpenFOAM:
sudo adduser \
  --disabled-password \
  --comment "" \
  <e3d_usr>
The user does not receive a local password. Login will later be performed exclusively using an SSH key.
2.2 Checking the file system of the home directory
Check which file system contains the user's home directory:
findmnt -T /home/<e3d_usr>
Local file systems such as ext4, xfs, or btrfs are suitable for container storage.
If the home directory is located on an NFS file system, configure a local storage path for Podman storage. NFS is generally not suitable for rootless container storage.
2.3 Permanently enabling user-specific systemd services
To allow user-specific systemd services to run even without an active SSH session, enable the linger function for the user:
sudo loginctl enable-linger <e3d_usr>
Then check the status:
loginctl show-user <e3d_usr> -p Linger
Expected output:
Linger=yes
3. Setting up the SSH key on the Windows PC
The OpenSSH client must be installed on the Windows PC.
3.1 Checking the OpenSSH installation
Open PowerShell and check whether the required programs are available:
Get-Command ssh.exe
Get-Command ssh-keygen.exe
Get-Command scp.exe

ssh.exe -V
OpenSSH for Windows provides, among others, the programs ssh, scp, and ssh-keygen.
3.2 Generating an SSH key
First define the path for the new SSH key:
$KeyPath = "$env:USERPROFILE\.ssh\<ssh_podman_e3d_usr>"
Create the .ssh directory if it does not already exist:
New-Item `
    -ItemType Directory `
    -Force `
    -Path "$env:USERPROFILE\.ssh" |
    Out-Null
Check whether key files already exist under the selected name:
Test-Path $KeyPath
Test-Path "$KeyPath.pub"
Both commands should return the following output:
False
Note: If files already exist at the specified path, check whether these keys are still required before proceeding to the next step. Existing keys must not be overwritten unintentionally.
Then generate a new SSH key:
ssh-keygen.exe `
    -t ed25519 `
    -a 100 `
    -f $KeyPath `
    -C "<e3d_usr>@<SERVER>"
This creates two files:
<ssh_podman_e3d_usr>       Private key
<ssh_podman_e3d_usr>.pub   Public key
Important: The private key must not leave the Windows PC on which REX3D or PSI is installed.
3.3 Transferring the public key to the server
First copy the public key to the server's temporary directory:
scp.exe `
    "$KeyPath.pub" `
    "<ADMIN>@<SERVER>:/tmp/<e3d_usr>.pub"
Then log in to the server as an administrator:
ssh.exe <ADMIN>@<SERVER>
3.4 Installing the public key for the Podman user
First create the SSH directory for the Podman user:
sudo install \
  -d \
  -m 700 \
  -o <e3d_usr> \
  -g <e3d_usr> \
  /home/<e3d_usr>/.ssh
Then install the public key as authorized_keys:
sudo install \
  -m 600 \
  -o <e3d_usr> \
  -g <e3d_usr> \
  /tmp/<e3d_usr>.pub \
  /home/<e3d_usr>/.ssh/authorized_keys
Then delete the temporary file:
sudo rm -f /tmp/<e3d_usr>.pub
Finally, check the permissions:
sudo ls -ld /home/<e3d_usr>/.ssh
sudo ls -l /home/<e3d_usr>/.ssh/authorized_keys
3.5 Testing SSH login as the Podman user
On the Windows PC, establish an SSH connection using the newly generated key:
ssh.exe `
    -i "$env:USERPROFILE\.ssh\<ssh_podman_e3d_usr>" `
    <e3d_usr>@<SERVER>
After logging in, check the user, groups, and working directory:
whoami
id
pwd
Among others, the following values are expected:
<e3d_usr>
/home/<e3d_usr>
The output of id must show the user and group information for the user <e3d_usr>.
Optionally, you can test the SSH connection directly from the Windows PC:
ssh.exe `
    -i "$env:USERPROFILE\.ssh\<ssh_podman_e3d_usr>" `
    <e3d_usr>@<SERVER> `
    "whoami; podman --version"
4. Enabling the Podman socket on the server
4.1 Testing Podman as an unprivileged user
Log in to the server as <e3d_usr> and run the following command:
podman info
Important: The command must be executed without sudo.
4.2 Enabling the Podman socket
As the user <e3d_usr>, enable the Podman socket:
systemctl --user enable --now podman.socket
Then check the status:
systemctl --user status podman.socket --no-pager
4.3 Determining the socket path
Check the path of the Podman socket:
echo "$XDG_RUNTIME_DIR/podman/podman.sock"
ls -l "$XDG_RUNTIME_DIR/podman/podman.sock"
By default, the rootless Podman socket is located at:
/run/user/<UID>/podman/podman.sock
Determine the numerical UID of the user with the following command:
id -u
Make a note of the UID that is returned. It will be required later when setting up the Podman remote connection.
Podman uses systemd socket activation for the API socket. In combination with loginctl enable-linger, the socket remains available even without an active SSH session.
5. Setting up the Podman remote connection on the Windows PC
A Podman client must be installed on the Windows PC.
5.1 Adding the Podman connection
Open PowerShell and create a new Podman connection:
podman.exe system connection add `
    remote-vm-ktp `
    --identity "$env:USERPROFILE\.ssh\<ssh_podman_e3d_usr>" `
    "ssh://<e3d_usr>@<SERVER>/run/user/<UID>/podman/podman.sock"
5.2 Displaying the Podman connection
Display the configured connections:
podman.exe system connection list
The connection remote-vm-ktp should appear in the list.
5.3 Testing the Podman connection
Test the connection:
podman.exe `
    --connection remote-vm-ktp `
    info
The command should display information about the Podman installation on the Linux server.
The container is executed on the Linux server. Only the Podman remote client is used on the Windows PC.
6. Configuring the Podman connection in REX3D
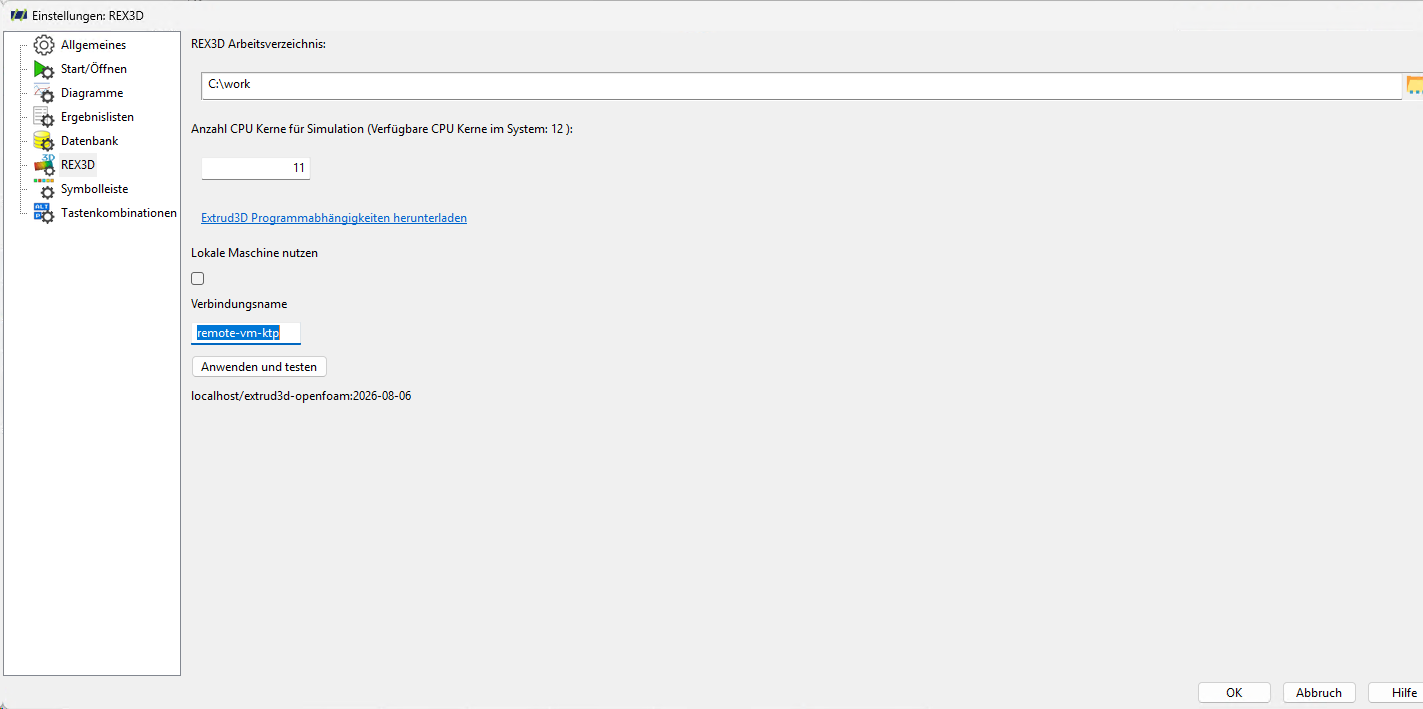
Open the REX3D options and enter the name of the previously created Podman connection.
When using the commands from this guide, the connection name is:
remote-vm-ktp
Clear the 'Use local machine' checkbox.
The available Podman connections can be displayed at any time using the following command in PowerShell:
podman.exe system connection list
After successful configuration, REX3D can use the OpenFOAM containers on the Linux server via the configured Podman remote connection.
Security notes
The Podman API socket provides full management access to all containers, images, volumes, and pods belonging to the user <e3d_usr>.
Important: Do not expose the Podman socket via an unprotected TCP port. Instead, use SSH access to the user's Unix socket as described in this guide.
The following recommendations apply to the user <e3d_usr>:
- The user should not have
sudoprivileges. - The user should not be a member of privileged groups.
- The user should have access only to the required files and directories.
- The user should be used exclusively for REX3D, PSI, and the associated OpenFOAM containers.
- A dedicated SSH key should be used for the user.
- The user must not be given access to private keys belonging to other users.