Dies ist eine alte Version des Dokuments!
Pre-Processing
Preparing a REX3D Simulation
Before a flow simulation can be performed, it must be configured as follows:
- Option 1: Menu: Simulation > Open REX3D Configuration
- Option 2: Double-click REX3D in the process tree

In the window that appears, select whether the simulation should be assigned to an existing process or whether no process assignment should be made.
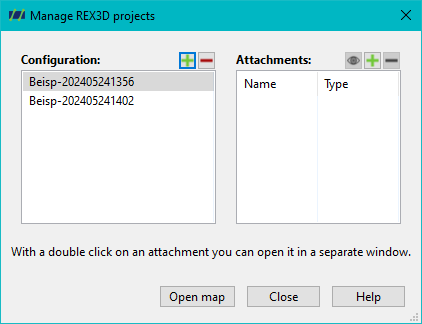
The following window then opens:
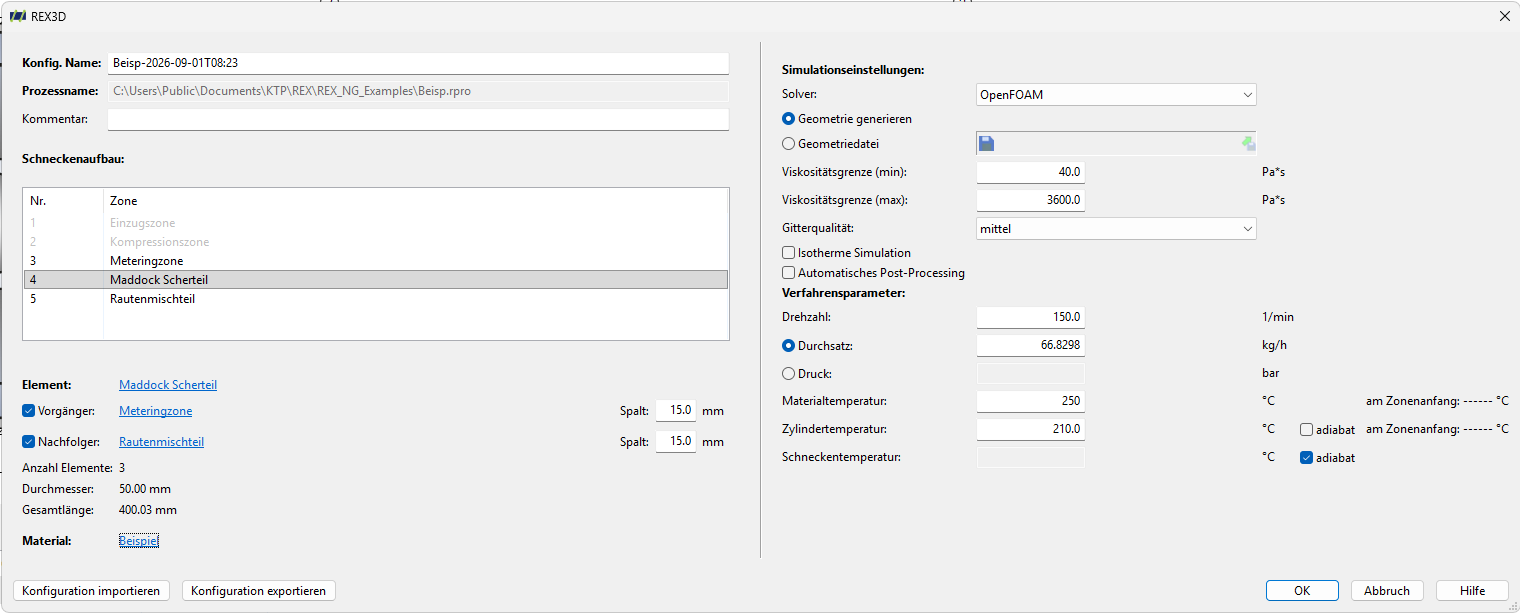
Defining the REX3D Configuration
The REX3D preprocessing dialog is used to define the screw configuration, material, simulation settings, and process parameters for the numerical flow simulation.
The upper section of the dialog displays the Configuration Name, the associated Process Name, and optionally a Comment.
Defining the Geometry
The Screw Configuration section lists the screw zones as well as the shear and mixing elements contained in the process in their respective order.
Selecting an entry displays the corresponding data in the lower section of the dialog.
A Predecessor and a Successor can be taken into account for the selected element.
A Gap must be defined between the selected element and the respective neighboring element.
In addition, the geometric parameters of the selected element are displayed.
Material
The material used for the simulation is displayed under Material. The corresponding material data can be accessed via the material entry.
Simulation Settings
The Simulation Settings section contains the basic settings for the numerical calculation.
OpenFOAM and FeatFlow are available as Solver options.
Two options are available for the geometry:
- Generate Geometry
- Geometry File
When Generate Geometry is selected, the geometry required for the simulation is generated from the defined screw configuration. Alternatively, an existing geometry can be selected using Geometry File.
The Viscosity Limits define the viscosity range taken into account during the calculation.
The Mesh Quality determines the spatial resolution of the computational mesh. You can choose between coarse, medium, and fine. A higher mesh quality results in a finer computational mesh, but also increases the computational and memory requirements.
The Isothermal Simulation option can be used to perform a calculation with a constant material temperature. If this option is not activated, the temperature development of the melt is taken into account in the thermal calculation.
With Automatic Post-Processing, an automatic evaluation of the calculation results can be started directly after the simulation has been completed.
Defining the Process Parameters
The Process Parameters section is used to define the operating conditions for the simulation.
For the flow simulation, either the Throughput or the Pressure can be specified.
The Material Temperature describes the temperature of the polymer melt at the inlet of the simulation domain under consideration.
Thermal Boundary Conditions
For the thermal simulation, the barrel and screw temperatures can either be specified or defined as adiabatic.
If adiabatic is deactivated, heat transfer can take place between the barrel and the polymer melt.
Importing and Exporting the Configuration
The Import Configuration button can be used to load settings from a previously saved REX3D configuration.
The Export Configuration button can be used to save the current configuration for later use.
Click OK to apply the settings. Click Cancel to close the dialog without applying the changes. Click Help to open the corresponding help page for the dialog.
Starting a REX3D Simulation
To start the simulation, expand the REX3D section under the project data. This section displays all created Extrud3D configurations assigned to the respective process.
Double-click the name of a configuration to open it:
- Set the number of CPU cores to be used. At least 3 CPU cores must be available for the simulation.
- The simulation can then be started using the Start REX3D Simulation button. The i button displays the required hardware specifications.
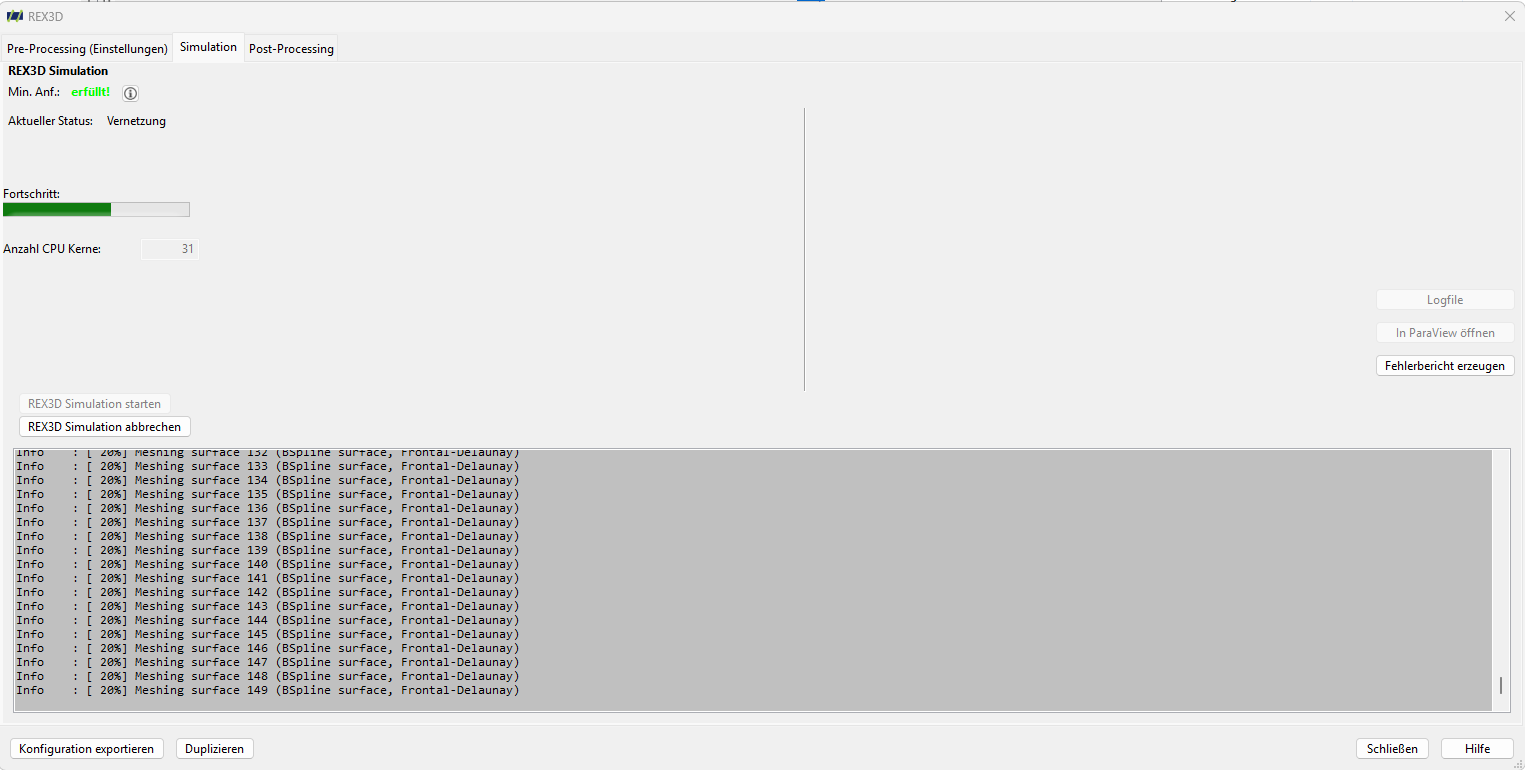
First, a three-dimensional finite-element mesh generator (gmsh) generates the geometry based on the previously defined input data and displays the result in a preview window.
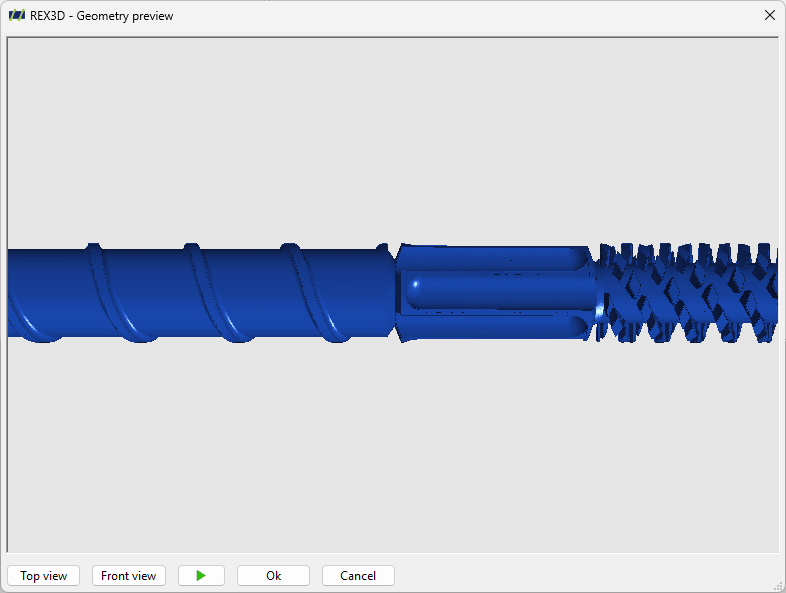
The element can be moved and rotated in three-dimensional space using the mouse. The Top View and Front View buttons provide predefined viewing angles of the generated element.
If the generated mesh meets the requirements, click the OK button to start the simulation.